Your Amazon product photography is your best salesperson. It’s the first thing a shopper sees, it’s what they use to inspect every detail, and it’s often the final nudge that turns a browse into a buy.
Great images do more than just look pretty—they stop the scroll, build immediate trust, and have a massive impact on your click-through and conversion rates.
Win the Click by Nailing Amazon's Image Requirements
Before you start planning cool lifestyle shots, you have to get the basics right. Amazon has a strict set of rules for product images, and they aren't just suggestions. They’re designed to create a clean, consistent shopping experience for customers.
Getting these rules wrong doesn't just look sloppy; it can get your entire listing suppressed. A suppressed listing is invisible, and an invisible product makes zero sales.
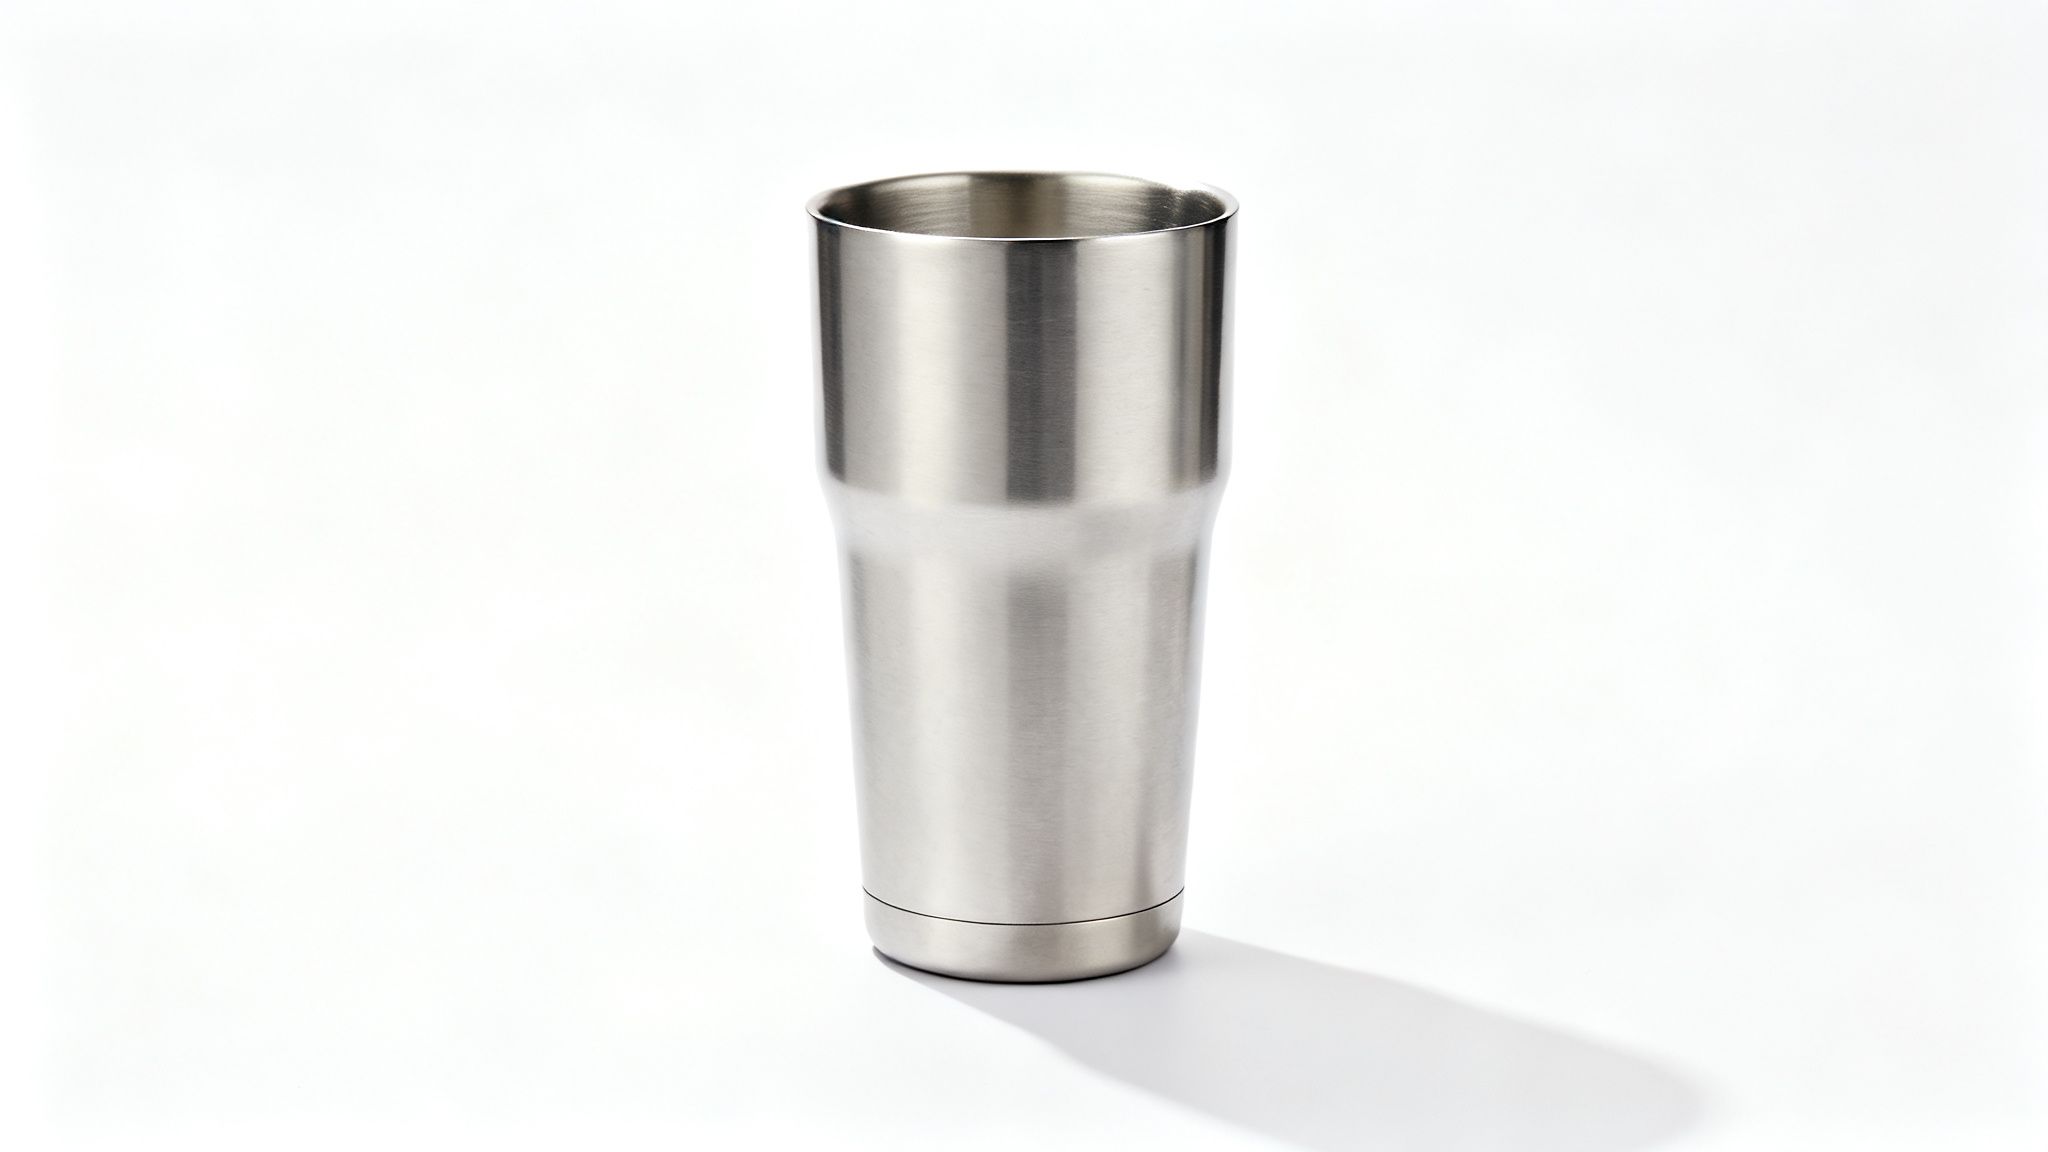
Your main image—often called the "hero image"—gets the most scrutiny. This is the single image that shows up in search results, and it's your one chance to grab a shopper's attention in a sea of competitors. Think of it like a book cover on a crowded shelf. If it's blurry, dark, or cluttered, shoppers will scroll right past it.
The Main Image Rules: No Exceptions
Amazon is incredibly strict about the main image. There’s no room for creative flair here. The only goal is to show the product clearly, honestly, and without any distractions.
Here’s what you absolutely must do:
- Pure White Background: The background has to be pure RGB (255, 255, 255). Not off-white, not light gray. Pure white. This makes your product pop and keeps search results looking clean.
- Fill the Frame: Your product must take up at least 85% of the image area. This makes your product look bigger and more detailed in the small thumbnail view, which helps grab attention.
- Product Only: The main image can only show the product being sold. That means no text, no logos, no watermarks, no props, and no extra graphics. Just the product.
- It Must Be a Real Photo: You have to use an actual photograph of your product. Illustrations, 3D models, and drawings are a no-go for the main image because they can misrepresent what the customer actually receives.
Following these rules is your ticket to play. Ignoring them is the fastest way to get your listing sidelined, killing your sales before they even start.
Why Technical Specs Are Your Secret Conversion Weapon
Beyond the basic rules, the technical specs of your images play a huge role in the customer experience. Getting them right doesn't just keep you out of trouble; it actively helps you sell. This isn't a minor detail—over 80% of Amazon shoppers say images are the most important factor in their buying decision.
To give you a quick reference, here’s a checklist of the technical requirements for your main image.
Amazon Main Image Technical Requirements Checklist
| Requirement | Specification | Why It Matters |
|---|---|---|
| Minimum Size | 1,000 pixels on the longest side | Enables the zoom feature, which builds trust and increases conversions. |
| Recommended Size | 2000 x 2000 pixels or larger | Provides a much clearer, higher-quality zoom experience, signaling a premium product. |
| Background Color | Pure white (RGB 255, 255, 255) | Ensures consistency in search results and makes your product the hero. |
| Product Occupancy | At least 85% of the frame | Makes your product appear larger and more detailed in thumbnails, winning more clicks. |
| File Format | JPEG, PNG, TIFF, or GIF | JPEG is recommended for the best balance of quality and file size for fast page loads. |
| Color Mode | sRGB or CMYK | sRGB is the web standard and ensures colors look accurate across different devices. |
| No Extras | No text, logos, or watermarks | Keeps the focus entirely on the product and prevents listing suppression. |
The most important spec on that list is image size. Amazon requires images to be at least 1,000 pixels on the longest side to activate the zoom feature. Zoom is a massive sales tool. It lets customers inspect the texture of a fabric, the quality of stitching, or the finish on a piece of electronics. When they can do that, their confidence goes way up. A listing without zoom feels cheap and untrustworthy.
Pro Tip: 1,000 pixels is the bare minimum. I always recommend uploading images that are 2000 x 2000 pixels or even larger. This gives shoppers a super crisp, detailed zoom experience that screams quality.
Finally, file format matters. Amazon accepts JPEG, PNG, TIFF, and GIF files. For most sellers, JPEG is the way to go. It offers a great mix of high image quality and a small file size, which means your listing will load quickly for customers.
If you want to dig deeper into how all these pieces fit together, our guide on how to optimize Amazon product listings is a great next step. Getting these foundational rules right isn't just about avoiding penalties—it's about building the strongest possible launchpad for your business.
Crafting a Compelling Visual Product Story
Your main image gets the click, but your other photos have to close the sale. A single, perfect hero shot just isn't enough to convince a savvy online shopper anymore. Those other image slots are where you build trust, answer questions before they're asked, and tell a story that turns a "maybe" into a definite "yes."
Think of your image gallery as your silent salesperson. It walks a customer through every feature, benefit, and use case. Each photo has a specific job to do, and when they all work together, they build a powerful narrative that crushes doubt. This is a proven way to bring down return rates and boost conversions.
The Seven Essential Shots for Every Listing
To build a complete visual story, you need to go beyond just showing what the product looks like. You have to show what it does and what it will feel like to actually own it. A solid Amazon photography strategy always includes a mix of shots that inform, persuade, and genuinely connect with the buyer.
Here are the seven types of images that create a complete and compelling product listing:
The Main Image: We've already covered this, but it’s the non-negotiable starting point. It has to be compliant, set against a pure white background, and show the product with absolute clarity. This is your first impression; don't mess it up.
Alternate Angles: Show your product from every side—top, bottom, back, and any other key angle. If you're selling a backpack, this means showing the straps, the back padding, and the side pockets. This kind of transparency builds trust by leaving no detail hidden.
The Infographic Callout: This is your chance to visually highlight your product's top three to five features. Use clean graphics and minimal text to point out what makes it great. For a water bottle, you might call out its "leak-proof lid," "BPA-free material," and "24-hour insulation."
The Lifestyle Shot: This is arguably the most powerful image after your main one. Show your product being used in its natural habitat by your target customer. A photo of a yoga mat on a white background is fine, but a photo of someone happily using that mat in a bright, sunny studio? That's what sells.
Size and Scale Comparison: One of the biggest reasons for returns is a mismatch in size expectations. An image showing your product next to a common object (like a phone or a coffee mug) or overlaid with clear dimension lines solves this instantly. It removes the guesswork and cuts down on buyer hesitation.
Detailed Close-Ups: Let people zoom in on what makes your product special. Show off the quality of the stitching on a leather wallet, the texture of a skincare cream, or the durable clasp on a piece of jewelry. These shots scream high quality and help justify a premium price point.
Packaging Photo: Showing your product's packaging does two important things. First, it reinforces your brand's quality and shows the item is well-protected. Second, it sets the right expectations for anyone buying it as a gift.
Bringing Your Visual Story to Life
Just having these seven shots isn't enough; they have to flow together. Imagine you’re selling a high-end coffee grinder. Your main image is a crisp, clean shot of the grinder on white. The next image shows it from the top, displaying the bean hopper.
Then, an infographic points out the "30+ Grind Settings" and "Stainless Steel Burrs." This is followed by a lifestyle shot of someone smiling as they brew coffee in a beautiful, modern kitchen. A comparison image shows it sitting next to a standard coffee mug to highlight its compact countertop footprint. Finally, a macro shot reveals the precision-engineered burrs up close.
This sequence doesn't just show a product; it tells a story about quality, ease of use, and the awesome experience of making great coffee at home. For more inspiration on how to arrange these shots, you might want to check out some creative photography collage ideas to see how multiple visuals can create a single, powerful message.
Remember, every image slot on your Amazon listing is valuable real estate. Wasting one on a redundant or low-quality photo is like leaving money on the table. Each image must have a clear purpose in your visual sales pitch.
When you thoughtfully plan your Amazon product photography around this framework, you’re not just uploading pictures. You're building a convincing argument, answering customer questions visually, and creating a shopping experience that gives buyers the confidence to click "Add to Cart."
Choosing Between DIY and Professional Photography
One of the biggest crossroads every Amazon seller hits is the photography question: Do you roll up your sleeves and shoot the images yourself, or do you bring in a professional? There’s no single right answer here. The best path for you depends entirely on your budget, your product, your current skills, and where you want to take your brand.
Making the right call is critical. Top-notch Amazon product photography can send your conversion rates through the roof, while weak, amateurish images can kill a great product before it even has a chance. Let's break down both options so you can choose wisely.
The Case for DIY Photography
Going the DIY route is incredibly tempting, especially if you're a new seller or watching your budget closely. The most obvious win is cost. A professional shoot can set you back anywhere from a few hundred to several thousand dollars. In contrast, you can piece together a solid DIY setup for less than $200.
This approach also gives you complete control over the creative direction and timing. Need a new shot for a promotion tomorrow? No problem. You can just set up your gear and get it done.
The trade-off, however, is your time and the steep learning curve. Getting professional-looking results takes more than just a decent camera. You need to understand lighting, composition, and post-processing. Poorly executed DIY photos with bad lighting or sloppy backgrounds will make your brand look amateurish and can seriously damage customer trust.
Setting Up a Simple Home Studio
If you decide to shoot your own photos, you don't need a massive, expensive studio. A small, dedicated corner in your home or office is more than enough to produce killer images for your Amazon listings.
Here’s a basic setup that will get you started:
- A Solid Backdrop: Start with a simple white sweep. You can buy a professional paper roll or just grab a large sheet of white poster board from a craft store. Curve it from a table up against a wall to create that seamless, "floating" look without a harsh horizon line.
- Affordable Lighting: Good lighting is non-negotiable. Seriously, don't even think about using your camera's built-in flash. A basic kit with two softbox lights is a fantastic investment. Place one on each side of your product at about a 45-degree angle to create soft, even light and kill any harsh shadows.
- A Stable Surface: A sturdy table is all you need to set up your product and backdrop.
- A Tripod: This is a must-have for sharp, consistent images. A tripod gets rid of camera shake, which is a huge deal, especially when you're not working with a ton of light. You can find decent ones for both smartphones and DSLR cameras.
The single biggest mistake I see new DIY photographers make is underestimating lighting. Natural light from a big window can work in a pinch, but it's wildly inconsistent. A simple two-light softbox setup gives you total control, ensuring every photo looks bright, clean, and professional.
When to Hire a Professional Photographer
Hiring a pro is an investment, but it's one that often pays for itself many times over. The biggest advantage you're paying for is expertise. A seasoned product photographer already knows how to light tricky materials, style a shot to make it pop, and deliver images that nail all of Amazon's technical specs right out of the gate.
This route saves you a massive amount of time and guarantees a high-quality, consistent look for your entire product line. Professionals have the right gear, the right software, and the experience to make your product look its absolute best. This is especially true for products that are a nightmare to shoot, like reflective items (jewelry, chrome), transparent objects (glassware), or apparel.
The main drawback is, of course, the cost. But when you calculate the value of your own time and the potential sales you'd lose from subpar photos, the price tag often starts to look a lot more reasonable. The only other downside is giving up some of that instant control, as you'll be working on their schedule.
This flowchart breaks down the fundamental visual stages a pro will master to build a compelling listing for you.
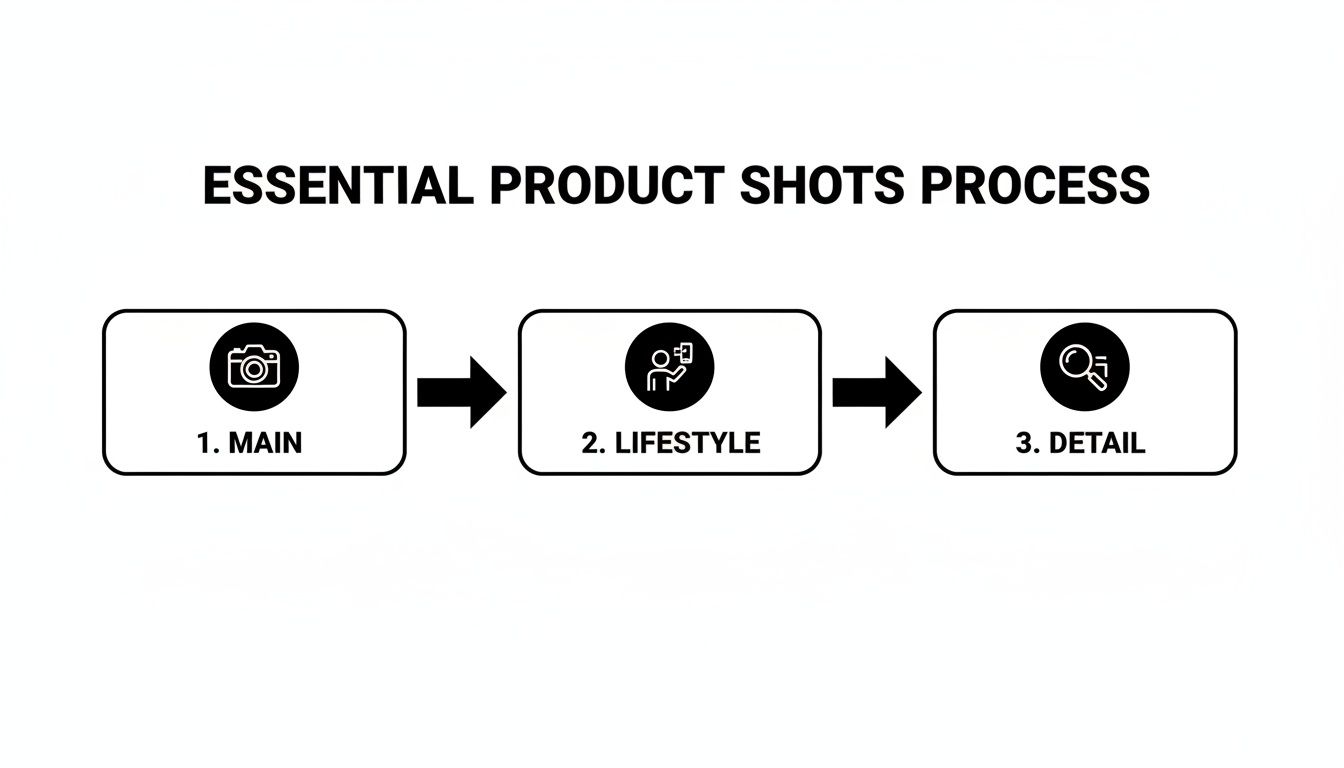
This progression—from a clean main image to contextual lifestyle shots and detailed close-ups—is what builds a complete visual story that convinces shoppers to click "Add to Cart."
Making the Right Choice for Your Business
So, how do you decide? Think about where your business is today and where you want it to be. If you're just starting out, have a pretty simple product, and are willing to put in the time to learn, DIY is a fantastic way to get going without a huge upfront investment. The skills you pick up will be valuable for years to come.
On the other hand, if your time is better spent on other parts of the business, you have a more complex product, or you're scaling your brand and need that top-tier, polished look, hiring a professional is the smarter move. Their expertise will translate directly into a more trustworthy listing that builds brand equity and drives more sales.
To make it even clearer, here’s a quick comparison to help you weigh the options.
DIY vs. Professional Photography Comparison
| Factor | DIY Photography | Professional Studio |
|---|---|---|
| Budget | Low initial cost (under $200 for a basic setup). | Higher investment ($500 – $5,000+ per shoot). |
| Control | Full creative and scheduling control. | Less direct control; dependent on the studio's schedule. |
| Time Investment | Significant time required for setup, shooting, and editing. | Minimal time required from you; just ship the product. |
| Quality & Skill | Quality depends entirely on your skill and equipment. | Guaranteed high-quality, professional results. |
| Consistency | Can be challenging to maintain across different shoots. | Excellent consistency, crucial for brand identity. |
| Best For | New sellers, simple products, tight budgets, or those willing to learn a new skill. | Established brands, complex products, scaling businesses, and maximizing conversions. |
Ultimately, whether you shoot your own photos or hire a pro, the goal is the same: to create images that stop scrollers in their tracks and convince them your product is the one they need. By understanding these trade-offs, you can make an informed decision that aligns perfectly with your goals for winning on Amazon.
Editing and Optimizing Images for Amazon's Platform
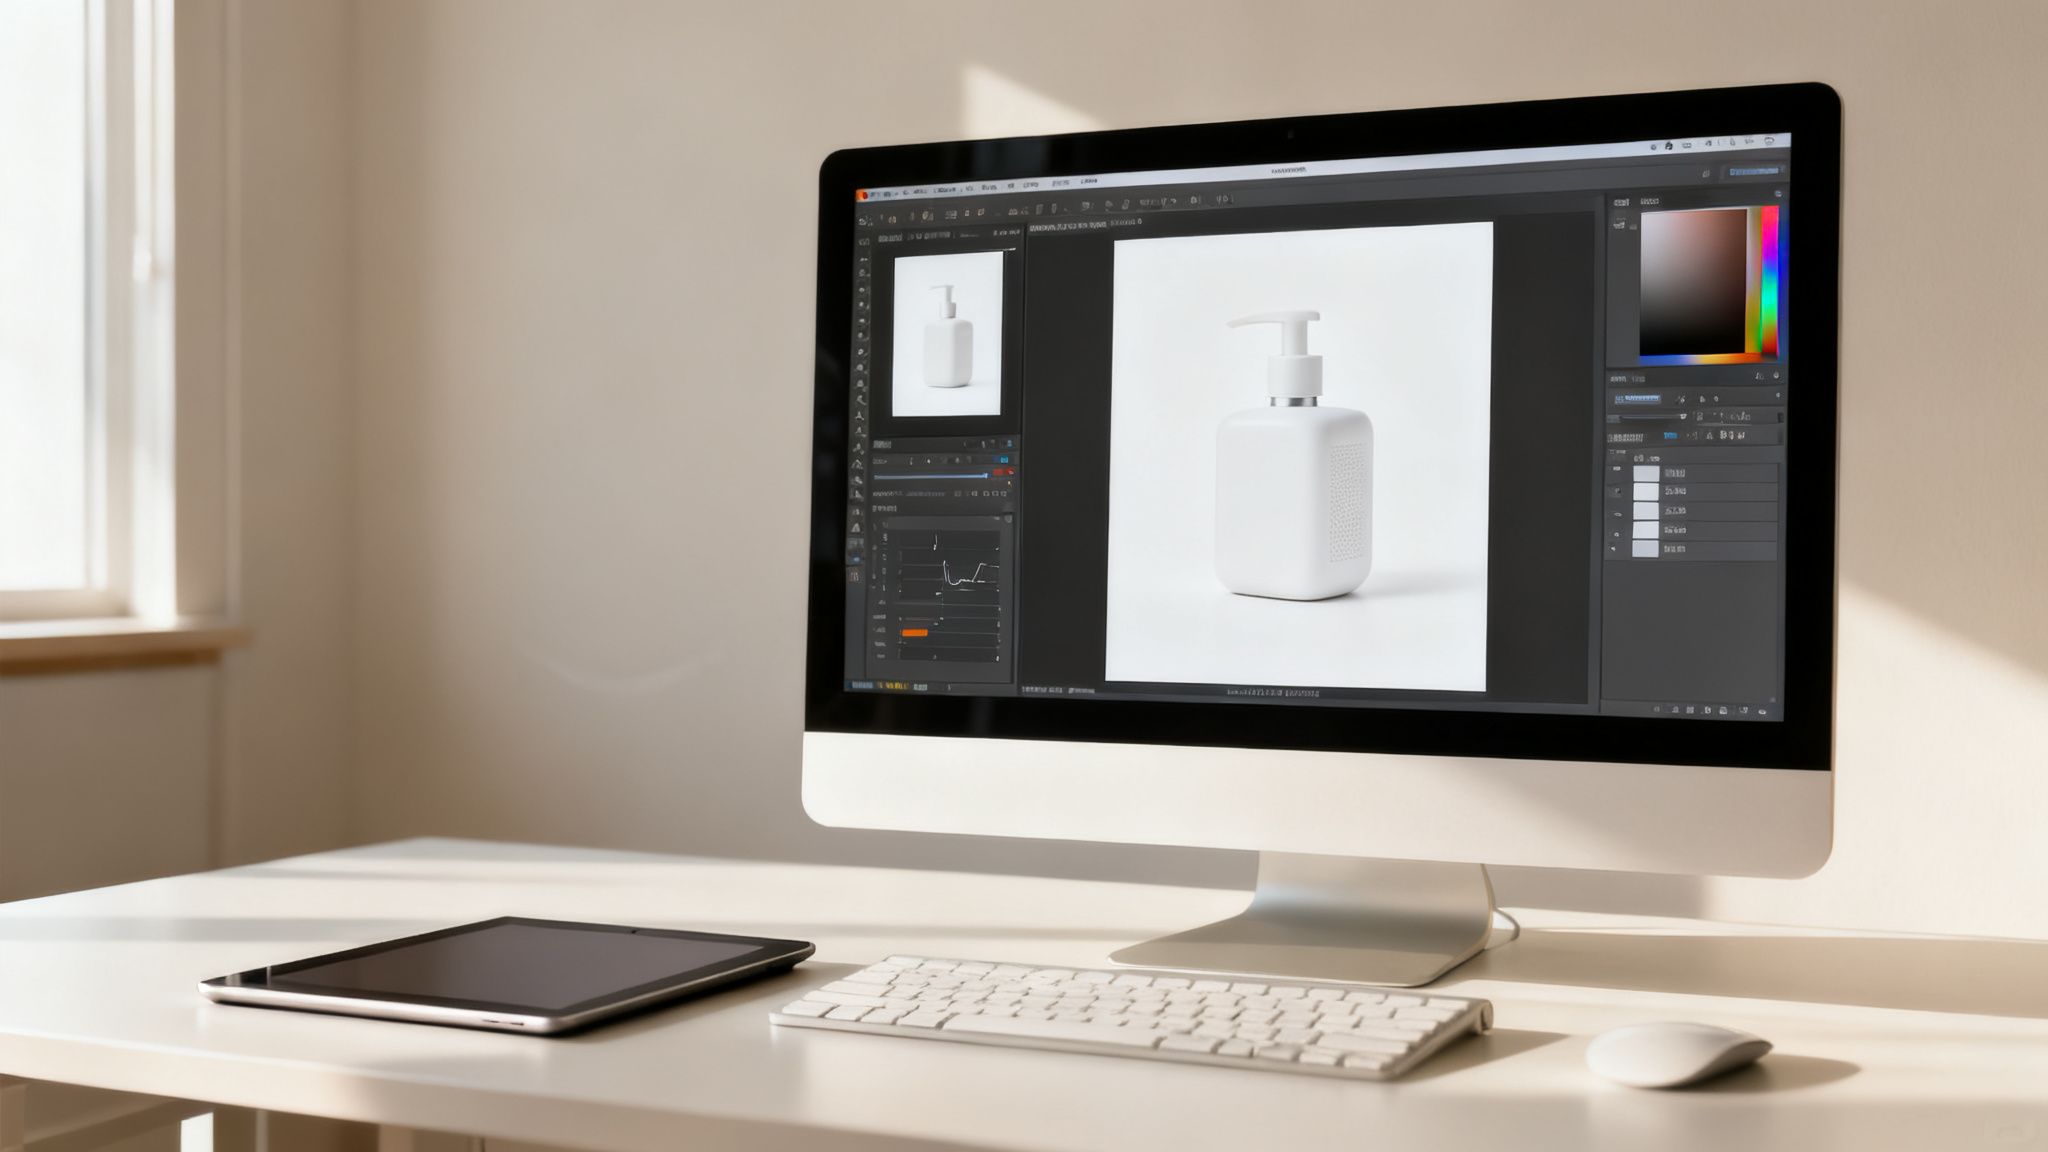
Taking a great shot is only half the battle. The real magic—the stuff that turns a good photo into a conversion machine—happens in post-production. This is where you polish your images to not only meet Amazon's strict rules but also to grab a shopper's attention and not let go.
I've seen too many sellers skip this part, and it's a huge mistake that leaves money on the table. A raw, unedited photo, no matter how perfectly you lit it, just won't look as sharp or professional as one that's been carefully retouched. This is your chance to make sure every single pixel is working to sell your product.
Achieving the Perfect White Background
First things first: that pure white background for your main image isn't a suggestion, it's a non-negotiable rule. Amazon requires a pure white background with an RGB value of (255, 255, 255). No exceptions. Anything less, like a light gray or an off-white, can get your listing suppressed.
There are a couple of ways to get this done:
- Manual Selection Tools: If you're using software like Adobe Photoshop, the Pen Tool gives you the most precise control for clean outlines. For a quicker, AI-assisted approach, the Object Selection Tool does a pretty solid job.
- Automated Services: There are tons of online tools and plugins built specifically for background removal. Many of them can knock out the task in just a few seconds.
And here's a pro-level skill to develop: learning how to make a transparent background. This is a lifesaver for your A+ Content and infographics. It gives you the freedom to place your product into any lifestyle scene or graphic without that clunky white box framing it.
Color Correction and Retouching
What you see on your camera's display isn't always what the customer sees on their monitor. Color correction is all about adjusting the tones and hues in your image so the product looks exactly like it does in real life. This is your best defense against returns from customers claiming, "the color wasn't what I expected."
Use the white balance and color grading tools in your editing software to nail the product's true color. A great trick is to take one of your first test shots with a gray card in the frame. You can use that card as a perfect reference point to set the white balance for the rest of your photos from that session.
Pro Tip: Once you've corrected the color, zoom in to 200%. Scan every inch of your product for tiny distractions like dust specks, fingerprints, or minor scratches from shipping. Removing these little imperfections creates a much cleaner, more premium feel.
This level of detail might seem obsessive, but it sends a powerful, subconscious message about quality and builds trust with the shopper.
Optimizing Files for Performance
Okay, your images are edited to perfection. The final step is saving them correctly. File optimization is key to ensuring your photos look crisp but also load lightning-fast—something that's crucial for both customer experience and your search ranking.
Amazon accepts a few file types, but JPEG is the gold standard for product photos. It strikes the best balance between high image quality and a small file size. When you export your files, make sure you save them in the sRGB color space. This is the standard for the web and ensures your colors look consistent across different devices.
Finally, let's talk about file names—an easy win that so many sellers ignore. Amazon prefers a specific naming convention that helps its system correctly process and assign your images to your listing.
- File Name Format:
ProductIdentifier.VariantCode.ImageType.FileExtension - Example:
B07XYZ1234.MAIN.jpg - Example with Variant:
B07XYZ5678.PT01.jpg
Here, the Product Identifier is just your ASIN, GCID, or UPC. The Variant Code (like PT01 for your first alternate image) is optional but super helpful. This simple habit helps prevent processing errors and ensures your images show up where they're supposed to.
Mastering this editing workflow guarantees every image you upload is a professional, high-performing asset. And if you're looking for more ways to get your listing to perform better, these conversion rate optimization tips go hand-in-hand with powerful visuals.
Using Images in A+ Content to Boost Conversions
If your main image gallery is what gets the initial click and the sale, your A+ Content is where you seal the deal for good. This is your brand's own little corner on the product page, a dedicated canvas to tell a richer story, tackle customer questions head-on, and create a premium feel that justifies your price tag.
Think of A+ Content as a mini-website embedded right into your listing. It’s your chance to break free from the standard image slots and use larger, more dynamic layouts. When you get it right, Amazon says A+ Content can bump your sales by an average of 3-10%. That’s a lift nobody can afford to ignore.
Building a Brand Story with Visuals
A+ Content is the perfect spot to tell your brand’s origin story or explain what drives you. A smart mix of high-quality lifestyle shots and sharp graphics lets you connect with shoppers on a much deeper level. Show them the people behind the product or the problem your brand was born to solve.
For instance, a company selling sustainable coffee could use a big, beautiful banner image of the farmers they work with. Below that, they could add smaller images walking through their eco-friendly roasting process. This kind of storytelling turns a simple bag of beans into a purchase customers can feel good about, creating a bond that goes way beyond price.
A+ Content lets you answer the "why" behind your product. Why should a customer choose you over a dozen cheaper alternatives? Often, a compelling brand story told through powerful images is the answer.
Using Comparison Charts and Infographics
One of the most powerful tools in your A+ toolkit is the comparison chart. This is where you get to visually stack your product up against the competition or even other models in your own lineup. Instead of making shoppers read a wall of text, you can use crisp product photos and clear icons to showcase what makes you better.
Here’s how to put them to work:
- Highlight Key Differentiators: Use a side-by-side view to prove your product's superior materials or unique features. A blender brand could show its heavy-duty stainless steel base right next to a competitor's flimsy plastic one. The difference is instantly clear.
- Simplify Complex Information: Turn technical specs into easy-to-digest infographics. A graphic showing how your air purifier’s five-stage filtration system works is way more convincing than a dense paragraph of text.
- Guide the Purchase Decision: Help customers pick the right product from your catalog. A chart comparing the battery life, capacity, and features of three different power banks prevents confusion and steers them to the perfect fit.
This visual approach makes your value proposition obvious at a glance, wiping out doubt and getting customers to the “buy now” button faster. For more strategies that pair perfectly with a strong visual game, check out our guide on how to increase sales on Amazon.
Overcoming Objections and Creating a Premium Feel
Every customer walks in with unspoken questions or potential objections. Your A+ Content is the ideal place to address them proactively with a combination of lifestyle images, detailed close-ups, and short, explanatory text. If you sell a complex electronic gadget, use a series of annotated photos to show just how simple the setup is.
Pair these informational graphics with aspirational lifestyle photography to build a truly premium experience. Large, immersive photos showing your product in a beautiful, real-world setting can elevate its perceived value in a huge way. This level of visual storytelling not only helps justify a higher price but also builds a stronger brand identity that keeps customers coming back.
To take your visuals a step further, you can even explore tools that offer AI Product Video features, giving your A+ Content a dynamic edge that really stands out.
Common Questions About Amazon Product Photography
Even with the best playbook in hand, you’re bound to hit a few snags when you get into the weeds of an Amazon photoshoot. Let's tackle some of the most common questions that trip up sellers, whether they're just starting out or have been in the game for years.
Getting these right from the start can save you a ton of time and prevent some expensive do-overs.
Can I Really Just Use My Smartphone for Amazon Photos?
Absolutely. Today’s smartphone cameras are ridiculously powerful, and for most products, they're more than enough to get the job done. In fact, a lot of incredible Amazon listings were shot entirely on a phone. The secret isn't the camera—it's how you use it.
If you’re going the smartphone route, you need to nail two things: lighting and stability. A cheap tripod and a simple two-light softbox kit will give you a far bigger leap in quality than a new phone ever could. Just be sure to shoot in the highest resolution your phone offers and never use the digital zoom. That’s a surefire way to get a grainy, pixelated mess.
How Many Images Do I Actually Need?
Amazon gives you nine image slots, but only the first seven show up above the fold on most desktop browsers. While you don't have to fill every single one, aiming for at least six to seven high-quality images is a proven way to lift your conversion rate.
Why? Because a listing with just one or two photos feels incomplete, even a little sketchy. A full image stack—your main image, a few different angles, an infographic, a lifestyle shot, and a size comparison—answers questions before a shopper even thinks to ask them. It builds the confidence they need to click "Add to Cart."
Your goal isn’t to hit a quota; it’s to make every image slot work for you. Each photo should tell a piece of your product's story. If it doesn't show a key feature, demonstrate a use case, or overcome an objection, it's just wasting prime real estate.
Are 3D Renders Allowed Instead of Real Photos?
This question comes up a lot, especially for complex products or items that are a pain to photograph perfectly.
For your main image, the answer is a hard no. Amazon’s terms are crystal clear: the main "hero" image must be a real photograph of the product on a pure white background. Using a render here is a fast pass to getting your listing suppressed, no questions asked.
But for your secondary images—those other six to eight slots—3D renders can be a game-changer. They’re fantastic for creating cutaway views to show off internal tech, displaying a dozen color variations without a massive photoshoot, or building flawless infographics. Just make sure the renders are hyper-realistic and perfectly match the actual product. Anything less will just lead to bad reviews and returns.
What’s the Single Biggest Mistake I Can Make?
Hands down, the most common and damaging mistake is bad lighting. It's the root of almost every other problem in product photography.
Poor lighting is why photos look grainy, amateurish, and cheap. It’s why colors look "off," leading to angry customers and costly returns. Trying to get by with the overhead light in your office or a single window is a recipe for harsh, ugly shadows that make your product look terrible.
Investing in a basic, controlled lighting setup is the best money you will ever spend on your photography. It guarantees your product looks professional, the colors are accurate, and all the important details are crisp and clear. That visual trust translates directly into sales.
Ready to turn your product images into your best sales tool? The team at Next Point Digital specializes in creating and optimizing Amazon listings that convert. From professional photography to strategic A+ Content, we build the visual assets that drive growth. Find out how we can help you sell more.