Excellent product photography isn't just about taking clear pictures; it's your single most effective sales tool in a crowded digital marketplace. It’s about creating a suite of images that not only meet Amazon's strict technical rules but also tell a compelling visual story that builds trust, answers questions, and ultimately, drives sales.
Why Great Amazon Photography Is Non-Negotiable

In the world of online shopping, your product photos are the closest a customer gets to actually holding your item. They aren't just decorative elements on your listing—they're the primary driver of clicks, engagement, and sales. Think of your image gallery as your digital storefront and your best salesperson, working 24/7.
A blurry, poorly lit photo doesn't just look unprofessional; it actively harms your brand. It screams a lack of care, causing potential buyers to question the quality of the product itself. In a marketplace where trust is everything, amateur photography is a red flag that sends shoppers straight to your competitors.
The Psychology of a Purchase Decision
Shoppers make snap judgments. When scrolling through a search results page, they decide in milliseconds which listing to click on, and that decision is almost always based on the main "hero" image. Your primary photo has one job: stop the scroll and earn that click.
Once they land on your product detail page, the rest of your images have to take over. They must work together to build a complete picture of your product's value, going far beyond just showing what it looks like. Your images should:
- Build Instant Trust: Clean, high-resolution photos signal a legitimate, trustworthy brand.
- Communicate Unspoken Value: Professional shots convey quality, instantly raising the perceived value of your product.
- Answer Customer Questions: Lifestyle and infographic images can show scale, use cases, and key features, preemptively addressing common buyer hesitations.
High-quality product photography is a game-changer for Amazon sellers. In fact, studies show it can boost conversion rates by up to 30% compared to amateur snaps.
The Tangible Impact on Your Metrics
Investing in professional photography for Amazon isn't an expense; it's a direct investment in your business's key performance indicators. High-quality visuals have a measurable impact that extends far beyond just looking good.
Recent analytics reveal just how critical this is. Blurry or poorly lit photos can cause 75% of buyers to scroll past a listing without a second thought. Why? Because these images instantly erode trust and suggest a low-quality item. You can find more insights on how professional photography impacts sales on sites like MyAmazonGuy.com. This direct link between image quality and sales performance is why cutting corners here is one of the most expensive mistakes a seller can make.
Strong photography directly influences everything from click-through rates (CTR) on search pages to the final conversion rate on your product page. Better images mean more clicks, more "Add to Carts," and a stronger brand perception. This visual foundation is a core piece of a winning sales strategy, working hand-in-hand with your written content. For a deeper look at how visuals and text work together, check out our guide on how to optimize Amazon product listings.
Building Your Amazon Photo Shot List
A great photoshoot doesn't start when the camera comes out of the bag. It starts with a smart, strategic plan—your shot list. This isn't just a checklist; it's your visual roadmap to making a sale, ensuring every single image has a job to do.
Trying to shoot without a plan is a recipe for chaos. You'll miss critical angles or forget to highlight a key feature, and you won't realize it until everything is packed up. A well-built shot list, designed specifically for Amazon, makes sure you cover all your bases and tell a complete story.
The Foundation: Your Main Hero Shot
Your main image, the hero shot, is the single most important photo on your listing. Full stop. It’s what shoppers see in the crowded search results, and its only goal is to stop their scroll and earn the click.
This image needs to be crystal clear, perfectly lit, and set against a pure white background (RGB 255, 255, 255) to meet Amazon's strict rules.
Your product should fill at least 85% of the frame, looking its absolute best. Think of it as your product's official headshot—no props, no distractions, just a clean, professional photo that builds instant trust. This isn't the place for creativity; clarity and compliance win the day.
Bringing Your Product to Life with Lifestyle Photos
If the hero shot is clinical, lifestyle photos are where you tell a story. These images show your product in its natural habitat, being used by real people. This is how you help customers see the item in their own lives, a powerful trigger that moves them closer to buying.
- Show the Benefit, Not Just the Feature: Selling a premium kitchen knife? Don't just show someone holding it. Show it gliding effortlessly through a ripe tomato, demonstrating its sharpness in action.
- Know Your Audience: The models, setting, and vibe of your lifestyle shots need to connect with your ideal customer. If you're selling a yoga mat, the scene should feel calm and centered.
- Create Aspirational Context: A killer lifestyle photo makes the customer want the experience your product provides, not just the product itself.
Your product doesn't exist in a vacuum. Lifestyle images provide the context that connects a customer's problem to your product's solution, answering the silent question, "How will this make my life better?"
Answering Questions Before They're Even Asked
Your other image slots are prime real estate for knocking down buying objections and giving customers the information they need to feel confident. Use this space to build a visual FAQ that reduces confusion and prevents returns.
Infographics and Feature Callouts
Infographics blend product photography with text and graphics to highlight key features and benefits. They're perfect for visually explaining what makes your product better than the competition.
For example, an infographic for a water bottle could use icons and short text to call out its leak-proof lid, BPA-free material, and double-wall insulation. That’s way more powerful than burying those details in a wall of text. If you need some creative fuel for blending images and text, checking out different photography collage ideas can be a huge help.
Scale and Detail Shots
One of the biggest gambles for online shoppers is size. A "scale shot" eliminates that guesswork by showing your product next to a common object or in someone's hand, giving an instant sense of its real-world dimensions. This one image can slash returns from customers complaining, "It was smaller than I expected."
You should also include close-up shots that highlight the details that prove your quality. Show the clean stitching on a leather wallet, the rich texture of a face cream, or the heavy-duty clasp on a necklace. These shots justify your price and show you stand behind your product's craftsmanship.
Your DIY Product Photography Setup
You don’t need a high-end commercial studio to get professional-looking product photos for your Amazon listings. In fact, with a few key pieces of gear and a bit of know-how, you can build a killer setup in your home or office. This saves you thousands of dollars and gives you total creative control.
The whole point is to create a controlled space where your images come out looking consistent and high-quality every single time. It’s less about owning the most expensive equipment and more about using affordable tools to get that clean, well-lit look that not only meets Amazon's rules but also makes customers want to click "Add to Cart."
The Core Components of Your Studio
Building your own setup really comes down to four things: a camera, something to keep it steady, a clean background, and good lighting. Nail these four elements, and you’ll solve 90% of the issues that make product photos look amateur.
- A Solid Camera: While a dedicated DSLR or mirrorless camera gives you more manual control, don't underestimate the camera in your pocket. Modern smartphones can produce incredible results, especially when you pair them with good lighting and a tripod.
- A Sturdy Tripod: This is non-negotiable. A tripod gets rid of camera shake, making your images perfectly sharp every time. It also lets you lock in your angle and composition, which is critical for shooting a consistent set of product photos.
- A Seamless Background: For your main hero image, you absolutely need a clean, distraction-free background. A simple roll of white seamless paper or even a large sheet of white poster board taped to a wall can create that pure white backdrop Amazon requires.
- Controlled Lighting: This is probably the most important part. You can't just rely on the overhead lights in your room—they create ugly, harsh shadows. Your best bet is to use either a large window for soft, natural light or an affordable artificial lighting kit.
Choosing Your Camera
When you're putting together your DIY setup, picking a camera is a big first step. Your smartphone is a fantastic place to start, but if you're ready for an upgrade, you don't have to break the bank.
Entry-level DSLR and mirrorless cameras from brands like Canon, Sony, and Fujifilm offer manual controls that give you way more creative freedom over your shots. Taking a look at a detailed guide to the best camera for photography can help you weigh your options and find something that fits your budget. Just remember, the lens you pick is often just as important as the camera body itself.
Crafting the Perfect Lighting
Lighting is what separates a professional product photo from a quick snapshot. The goal here is to create soft, even light that wraps around your product without creating any harsh, distracting shadows.
For a super budget-friendly option, set up next to a large window on an overcast day. The clouds act like a giant, natural softbox, diffusing the sunlight beautifully. You can use a cheap white foam board on the opposite side of your product to bounce that light back and fill in any shadows.
If you need more consistent results day or night, a simple lighting kit with two softboxes is a fantastic investment that will pay for itself over and over.
Pro Tip: A DIY lightbox is a game-changer for smaller products. You can build one out of a simple cardboard box. Just cut out the sides, cover the holes with white fabric or tissue paper, and shine lamps through from either side. This creates a beautifully diffused, wrap-around light that’s perfect for things like jewelry, cosmetics, or small electronics.
Once you have your setup, you can start thinking about the types of shots you need to create.
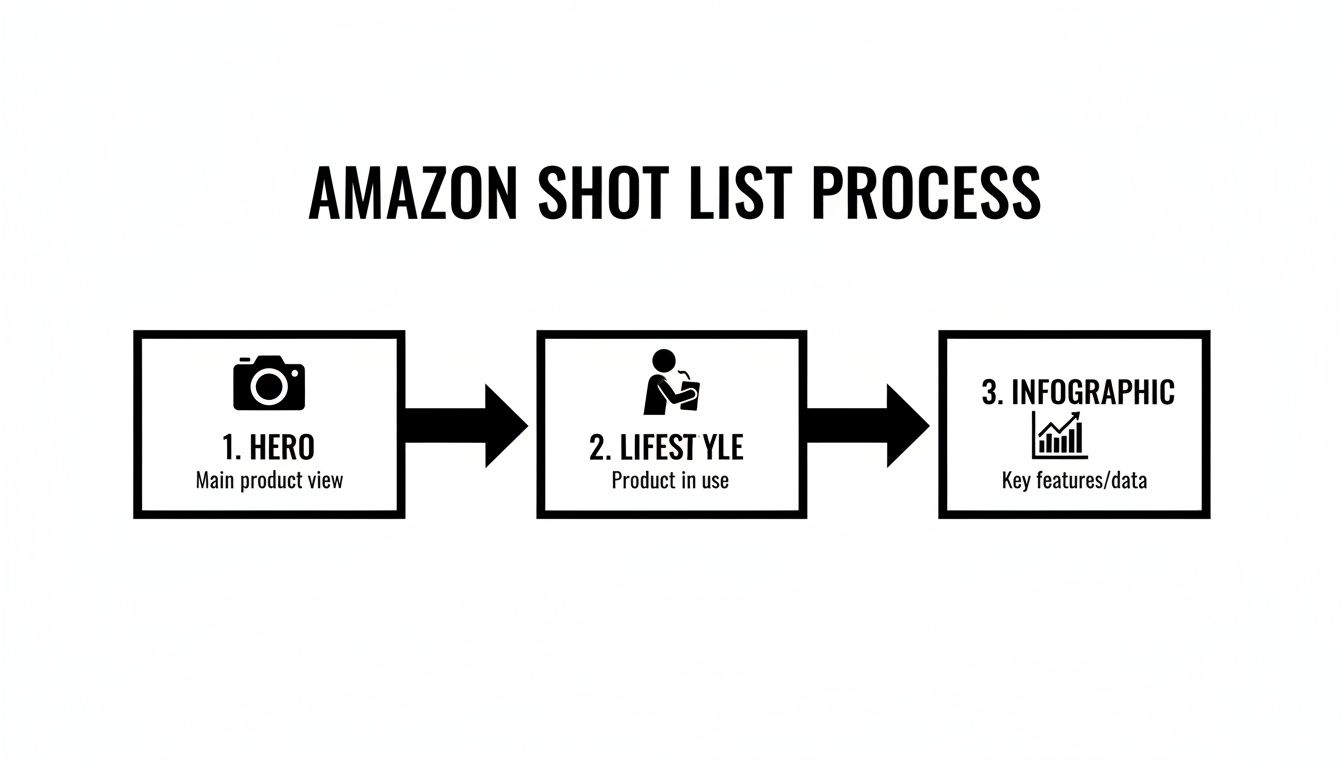
This workflow shows how you should plan your photography, moving from that essential, compliant Hero image to more engaging Lifestyle shots and informative Infographics.
Putting It All Together: A Practical Example
Let's say you're photographing a bottle of face serum. Here’s exactly how you’d use your DIY setup:
- Set the scene: Grab a large white poster board and tape it to a wall, letting it curve down onto a table. This creates a seamless "infinity" background with no hard lines.
- Position the product: Place the serum bottle right in the middle of the poster board.
- Frame the shot: Mount your camera or smartphone on a tripod and position it directly in front of the product. Adjust the height and angle until the bottle takes up about 85% of the frame.
- Light it up: Place a softbox light at a 45-degree angle to the product. On the opposite side, use a white foam board to bounce light back, which will soften any shadows on the bottle.
- Shoot and review: Take a few test shots. Zoom in and check your focus and exposure right on the camera screen. Make tiny adjustments to the light or the product's position until the image looks clean, bright, and tack-sharp.
This simple, repeatable process is the key. You don't need a massive budget to create professional-grade product photography for Amazon—you just need a solid plan.
Editing and Preparing Your Images for Amazon
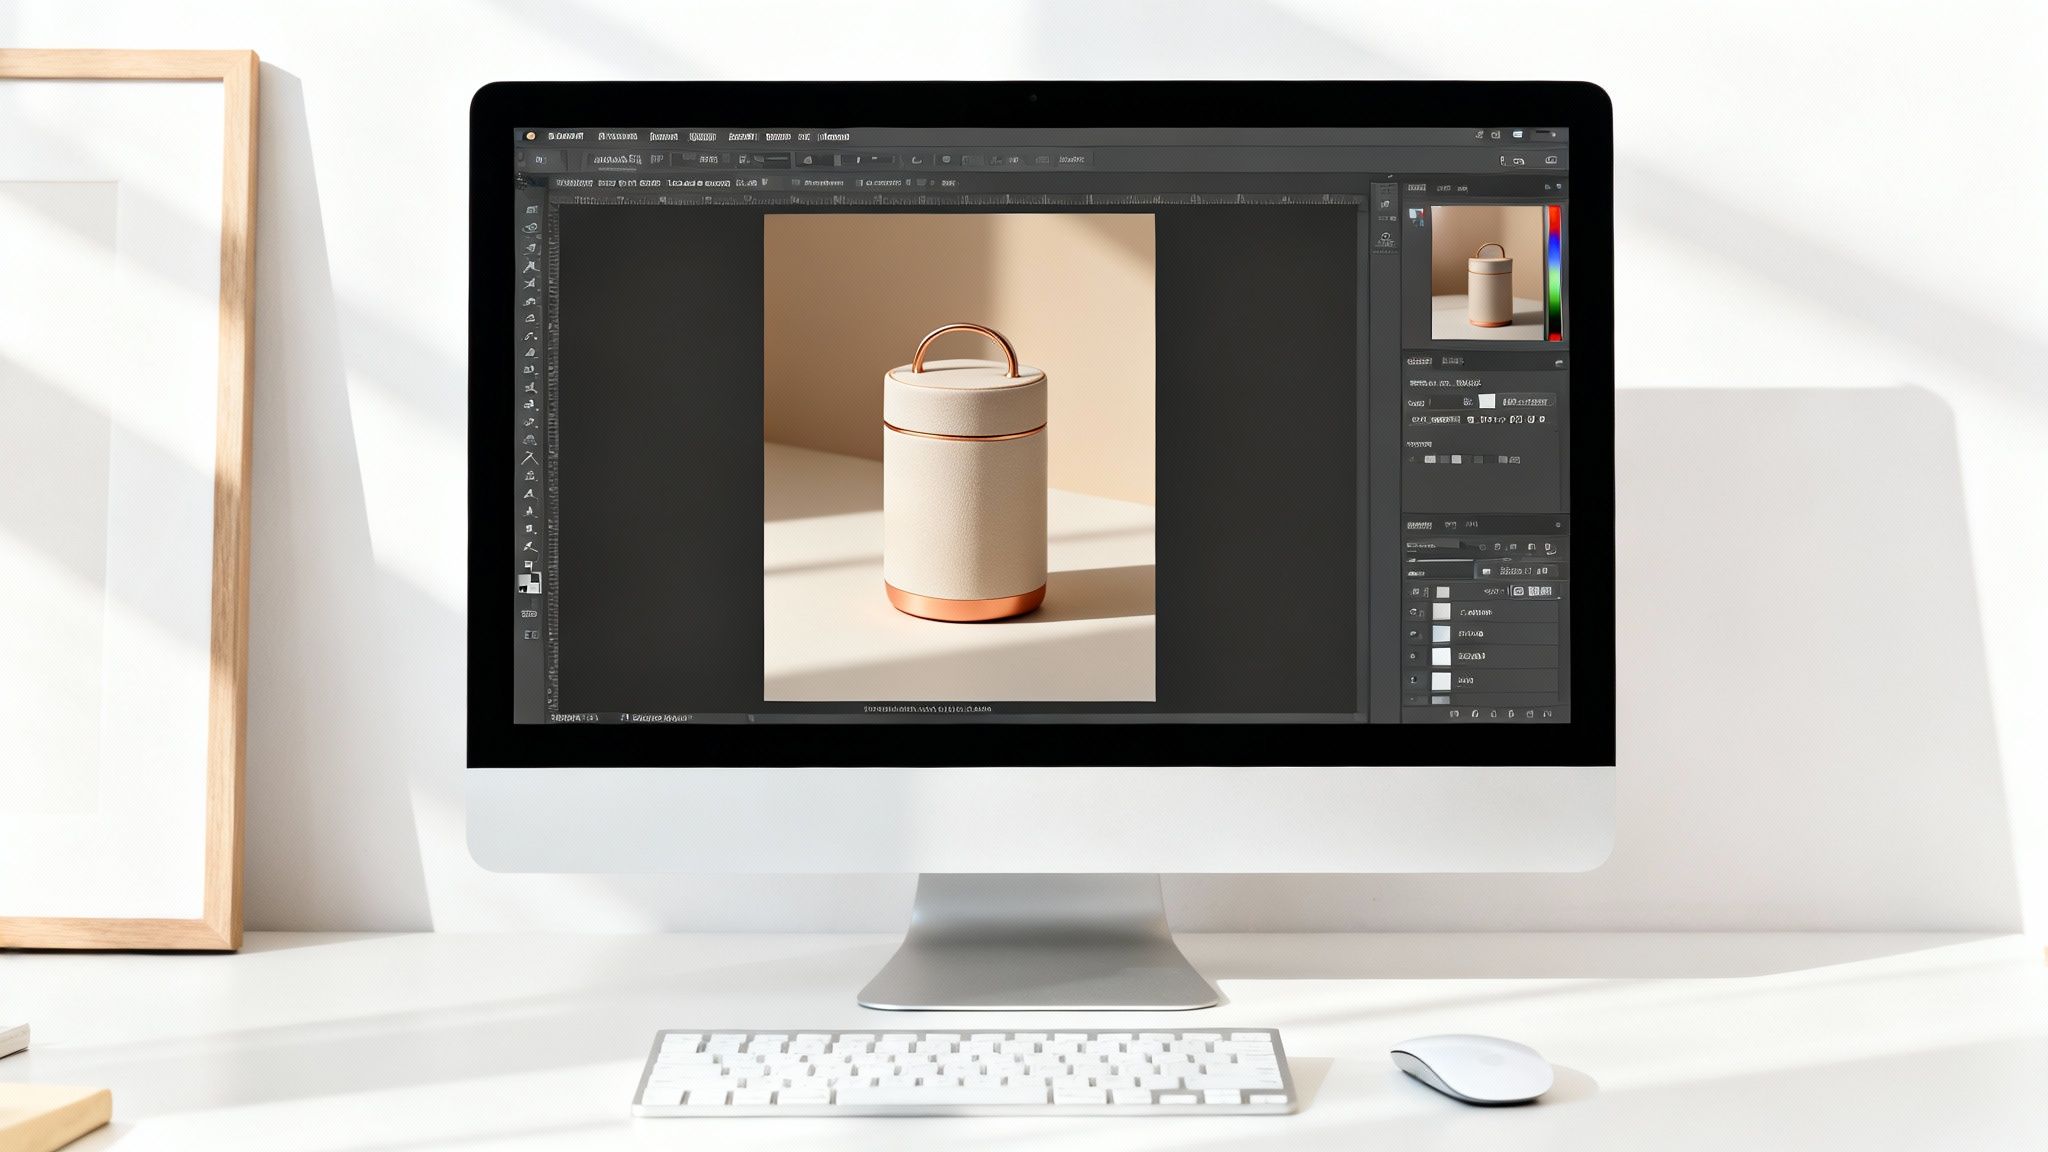
Taking a great photo is only half the battle. The real magic that turns a good shot into a high-converting Amazon image happens in post-production. This is where you polish your raw files, make sure they tick all of Amazon’s technical boxes, and get them ready to shine on your listing.
Think of editing not as "fixing" a bad photo, but as refining a good one. It's the final quality check that makes sure every image is working hard to build trust and drive sales. Even small tweaks to brightness, color, and cropping can make a massive difference in how customers perceive your product.
Ultimately, the editing process transforms your carefully shot images into strategic assets. It’s the bridge between what you captured in-camera and what the customer sees on their screen, ensuring your product looks its absolute best.
Mastering the Pure White Background
For your main hero image, Amazon has one non-negotiable rule: the background must be pure white (RGB 255, 255, 255). Getting close isn't good enough. A slightly off-white or gray background is a fast track to getting your listing suppressed.
This is where background removal becomes a critical skill for any Amazon seller.
Software like Adobe Photoshop is the industry standard, giving you precise tools like the Pen Tool for clean, sharp cutouts. But if you're looking for something simpler or more automated, there are plenty of user-friendly tools out there that can get the job done in a fraction of the time.
Tools that offer an AI-powered background removal demo can be a lifesaver, especially for meeting Amazon's strict requirements without spending hours on manual edits.
Essential Editing Adjustments
Beyond the background, a few other edits are crucial for creating standout Amazon product photos. These adjustments ensure your product looks vibrant, true-to-life, and professional.
Your editing workflow should consistently include these steps:
- Cropping and Straightening: Your product should be perfectly centered and straight, filling at least 85% of the frame. This gives it a clean, balanced look that feels intentional and professional.
- Color Correction: The colors in your photo must accurately represent the product. Adjust the white balance and saturation so that a "royal blue" shirt doesn't look like "navy" on screen. Mismatched colors are a common reason for returns.
- Exposure and Contrast: Brighten the image so it pops, but be careful not to "blow out" the highlights, which erases detail. Fine-tuning contrast adds depth and makes the product feel more tangible and three-dimensional.
- Retouching: This is where you clean up any dust, scratches, or minor imperfections on the product or background. It’s a small step that makes a huge difference in the final quality.
In the visual-first world of Amazon, at least 75% of shoppers admit that photo quality is a top factor in their purchasing decision. That attention to detail during the editing phase is exactly what makes an image feel "pro" and trustworthy.
Final File Preparation for Optimal Performance
Once your images are edited and looking sharp, you need to save them in the right format to perform well on Amazon. This step is just as important as the edits themselves, as it directly impacts page load speed and the customer's ability to zoom in on details.
Getting this right ensures your images are not only compliant but also contribute to a better user experience. Optimizing every image is one of those crucial conversion rate optimization tips that can quietly lift your sales.
Follow this checklist when you save your files:
- File Format: Always save your images as JPEG (.jpg). This is Amazon's preferred format because it offers the best balance of quality and file size.
- Image Size: Make sure your images are at least 1,000 pixels on the longest side to enable the zoom function. For the best results, I always aim for 2,560 pixels to show off maximum detail.
- Color Mode: Your images should be saved in the sRGB color mode. This is the web standard and ensures your colors look consistent across different devices and browsers.
- File Naming: Name your files according to Amazon's guidelines. This usually means using the product identifier (like the ASIN or UPC), a variant code, and the file extension (e.g., B00EXAMPLE.main.jpg).
By nailing these editing and preparation steps, you’re creating a set of images that don’t just look great—they're technically optimized to perform at the highest level within the Amazon ecosystem.
Knowing When to Hire a Professional
While the DIY approach is a fantastic, scrappy way to get your brand off the ground, there’s a tipping point every seller hits. It’s that moment when the time you’re sinking into photography starts costing you more in lost sales and missed opportunities than you’d spend hiring an expert.
Learning to recognize that moment is key to scaling your Amazon business.
When you’re starting out, handling your own product photography makes total sense. You have complete control, and it saves you precious cash when every dollar is stretched thin. But as your brand grows, that math starts to flip. The hours you spend tweaking lights, shooting angles, and editing photos are hours you’re not spending on marketing, sourcing, or developing new products.
Eventually, DIY photography becomes a bottleneck. If your photos are just "good enough" while your competitors' look exceptional, you are absolutely losing clicks and sales. That’s your sign. It’s time to bring in a professional.
The Clear Advantages of Professional Photography
Hiring a professional photographer isn’t just about getting prettier pictures; it's a strategic investment in your brand’s future. The benefits go far beyond what most sellers can achieve with an in-house setup, no matter how good it is.
Pros bring specialized expertise that’s tough to replicate. They live and breathe this stuff—they understand how light wraps around different materials, how to compose a shot that actually sells, and how to create a consistent, polished look across your entire catalog. That brand consistency is huge for building shopper trust.
You also get access to their high-end gear. We’re talking about cameras, specialized lenses, and sophisticated lighting rigs that would be completely impractical for most sellers to own. That equipment, in the hands of a skilled pro, produces a level of sharpness, color accuracy, and overall quality that helps your product command a premium price.
Finding the Right Photographer or Agency
Finding the right creative partner is everything. You’re not just looking for someone with a nice camera; you need someone who gets the very specific demands of ecommerce and, ideally, the Amazon marketplace itself.
Start by digging into portfolios that showcase clean, commercial work. Pay close attention to their lighting, consistency, and whether they can nail that pure white background.
- Review Their Portfolio: Do they have experience shooting products like yours? Look for crisp details and consistent lighting from one shot to the next.
- Check for Amazon Experience: A photographer who already knows Amazon’s technical rules (like the RGB 255, 255, 255 white background) is a massive shortcut to getting it right the first time.
- Discuss Their Process: Ask them about their workflow. How do they handle creative briefs, shot lists, and revisions? A clear, organized process is the mark of a true professional.
A professional photographer’s job isn't just to take pictures. Their job is to understand your brand and your customer, then create images that bridge the gap between them and drive a purchase.
Creating a Powerful Creative Brief
Once you’ve found a photographer you like, your success depends on clear communication. The single most important tool for this is a detailed creative brief. Think of it as the roadmap for the entire photoshoot, ensuring you and the photographer are perfectly aligned from the start.
A vague request for "some nice photos" is a recipe for disaster and disappointment. A strong brief removes all the guesswork and sets crystal-clear expectations.
Your creative brief should always include:
- A Detailed Shot List: Itemize every single angle, feature callout, and lifestyle concept you need. Be specific.
- Brand Guidelines: Share your brand's colors, fonts, and overall vibe.
- Inspiration and "Do Not" Examples: Provide links to competitor listings you love and, just as importantly, point out styles or shots you want to avoid.
- Target Audience Profile: Briefly explain who you're selling to. This context helps the photographer create images that will resonate with your ideal customer.
For businesses wanting to make sure their visual assets tie into a bigger digital strategy, partnering with a full-service agency that offers expert web services can be a game-changer. This ensures your product photography works seamlessly with your website and marketing campaigns, creating a cohesive brand experience that builds trust and boosts conversions everywhere you sell.
Common Questions About Amazon Product Photos
Even with a solid plan, a lot of little questions can pop up when you're dealing with Amazon's specific rules for product photography. Getting these details right is what separates a listing that converts from one that just gets lost in the crowd.
Here, we'll cut through the noise and tackle some of the most common questions sellers have. Think of it as your quick-reference guide for those last-minute "what if" scenarios that always seem to appear right before a shoot or during editing. Getting these answers straight will save you time, frustration, and a lot of headaches down the road.
How Many Product Images Should I Use?
Amazon gives you up to nine image slots, but if you want a truly optimized listing, you need to use at least seven images. Anything less is a massive missed opportunity. Hitting that number lets you build a complete visual story that answers customer questions before they even think to ask them.
Your first image is always the hero shot on a pure white background—that's non-negotiable. The other six slots are your real estate to sell the product. You should aim for a well-rounded gallery that includes:
- Different Angles: Show the product from the top, bottom, and sides.
- Lifestyle in Action: Put the product in a real-world setting so shoppers can see how it’s used.
- Infographics: Call out key benefits and features with text overlays and icons.
- Scale Shot: Photograph the product next to a common object (like a coin) or in someone's hand.
- Packaging Photo: Show off high-quality packaging to build perceived value and trust.
Filling these slots builds incredible trust with buyers and can make a real dent in your return rate.
Can I Really Use My Smartphone for Amazon Photos?
Absolutely. The cameras in modern smartphones are more than capable of producing professional-quality images for Amazon, especially if you're just starting out or on a tight budget. The secret isn't the phone itself—it's all about the setup.
To get it right, you have to control your environment. First, a tripod is non-negotiable. It ensures every shot is tack-sharp and completely free of blur. Good lighting is also critical. Try setting up near a large window to capture soft, natural light, which is almost always more flattering than harsh artificial lights. Finally, use a clean, simple background, like a large sheet of white poster board, to make your editing process a hundred times easier.
The biggest difference between a professional-looking smartphone photo and an amateur one isn't the camera. It’s the tripod and the lighting. These two simple things will solve 90% of the most common photo issues.
What Are the Biggest Photo Mistakes to Avoid?
Sellers tend to make the same few mistakes over and over, and they can seriously torpedo a listing's performance. The most frequent errors almost always boil down to bad lighting, low resolution, and not following background rules.
Bad lighting is an instant trust-killer. Photos that are too dark, have harsh shadows, or feature blown-out highlights make a product look cheap and unprofessional. Secondly, low resolution is a conversion killer. If any image is under 1000 pixels on its longest side, Amazon will disable the zoom feature. Customers rely on zoom to inspect details, and taking that away can dramatically lower your sales, a trend we often see reflected in wider Amazon sales data.
Finally, the most critical mistake you can make with your main image is failing to use a pure white background. It's a direct violation of Amazon's terms of service and can get your entire listing suppressed from search results, making you invisible to shoppers. Another huge error is only showing the product by itself; you lose a massive opportunity to connect with buyers through lifestyle shots and infographics that sell the value of the product, not just its features.
Do I Need a Full-Frame Camera?
Nope, you definitely don't need a full-frame camera to get excellent product photos. While they’re fantastic tools, modern APS-C cameras like the Canon R50 or Fujifilm X-T5 deliver outstandingly sharp and color-accurate images that are more than enough for Amazon.
Honestly, the quality of your lens and your lighting setup has a much bigger impact on the final image than the sensor size. A sharp macro or prime lens on an APS-C camera will almost always outperform an expensive full-frame camera paired with a cheap, low-quality kit lens. If you have a budget, put your money into good glass and lighting first.
At Next Point Digital, we turn compelling visuals into profitable sales. If you're ready to elevate your brand on Amazon with a data-driven strategy that combines stunning photography with expert listing optimization, we're here to help. Discover how our team can build a powerful marketplace presence that not only attracts customers but converts them.
Learn more at https://npoint.digital